Compiled and written by Kimberley, staff member, Cole Harbour Public Library
Craft instructions are provided at the bottom of this post. Please first read on for background on the meaning behind this craft, beadwork, and Truth and Reconciliation.
About Orange Shirt Day

From 1874 to 1996, approximately 150,000 children from First Nations, Inuit, and Metis communities were sent to Residential Schools. It is known that over 3,000 children did not return home. With unmarked graves being discovered and records being examined, it is estimated that over 6,000 never saw their families again.
Phyllis (Jack) Webstad was 6 years old in 1973 and going away to a residential school for the first time. Her grandmother saved up and bought her a beautiful, shiny orange shirt to wear. Those who worked at the school stripped her of the bright-coloured gift and never gave it back. That shirt became a symbol of her trauma and heartbreak.
She turned it into a symbol of healing. Orange Shirt Day began in 2013 on September 30.
In 2021, the day became known as the Day of Truth and Reconciliation. It is a day for many Canadians to learn and reflect on our shared history, in the hopes to begin healing.
Resources
- Learn more about Orange Shirt Day, opens a new window
- Learn more about the Day of Truth and Reconciliation, opens a new window
- Podcasts: Residential schools, opens a new window
- Documentary: Colonization Road, opens a new window
- Documentary: The Pass System, opens a new window
- Film: We Were Children, opens a new window
- Documentary Series: Elder in the making, opens a new window
- Free virtual events, opens a new window
- Explore Halifax Public Libraries' collection of Orange Shirt Day and Truth and Reconciliation content and reading lists, created with community
About beading
Beading as sacred
Beading has played a significant and often sacred role among the people of Turtle Island, for over 8,000 years. With porcupine quills and beads made of stone, shell, antler, and even glass, beading is important for artistic expression, communication, identification, and trade. Many patterns and styles of beaded ornamentation have been passed down through families, communities, and nations for generations.
Beading circles have been a key communal space for the intergenerational teaching of traditional skills and oral histories, and the sharing of stories, ideas, and deep reflections. However, as European colonization in Canada increased and spread, many indigenous traditions were suppressed. As with banning traditional languages and ceremonies, and the forced removal of children to residential schools, prohibiting beading practices aimed to erase individual and collective identity, knowledge, and sever multigenerational connections.
Beading as medicine and healing
Beading is a symbol of Indigenous resiliency. Many Residential School survivors, survivors of the sixties scoop, and their descendants who were denied knowledge of their heritage, began the process of rediscovering their history and reconnecting with their culture, by learning traditional skills from an Elder, artist or at a Friendship Center.
Over the last several decades, Indigenous artists and teachers have employed art and craft for healing—to rebuild, empower, and educate. Beading is intentional and purposeful, requires deep focus and concentration. Beading requires a willingness to seek peace through continuous, respectful actions and connections.
The beading process and beading circle is one that invites listening, contemplation and reflection, and create a space to build relationships. It can take many individual, thoughtful stitches, by many hands over many hours, to complete a single piece of sacred beaded regalia.
Step-by-step DIY Orange Shirt Day pin instructions
Downloads
Click to download or view PDF documents
- Original Instructions by Indigenous beader and educator, Jenny Blackbird.
- Halifax Public Libraries Instructions - with several updates to original.
Video tutorial
Prefer visual and verbal instruction? Bead along with the artist in her tutorial, How to Make a Beaded Orange Shirt Pin with Jenny Blackbird, , produced and hosted by University of Toronto's Ciimaan Kahuwe'ya Qajaq (CKQ) Indigenous Language Initiative and First Nations House Indigenous Student Services (FNH).
Written instructions

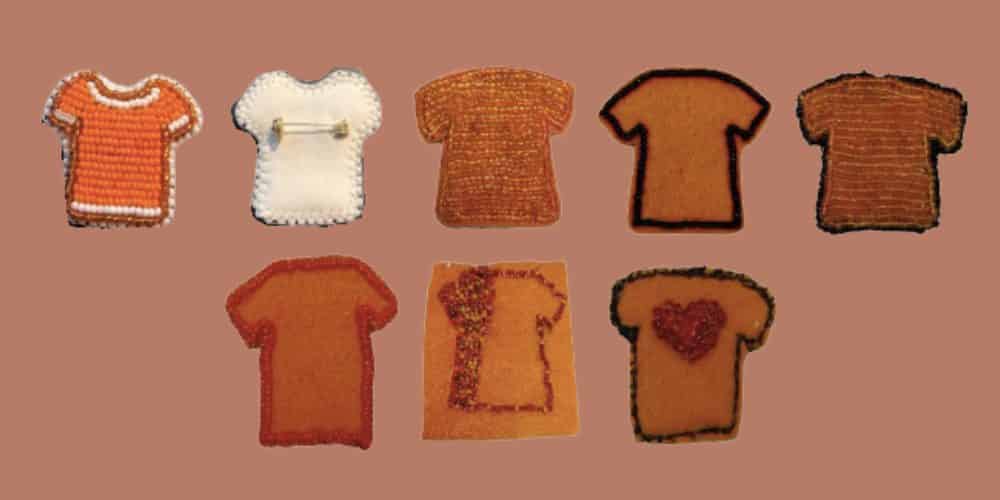
Here (above) are some examples to inspire you. You can make it as complicated or as simple as you like. Some were made freehand.
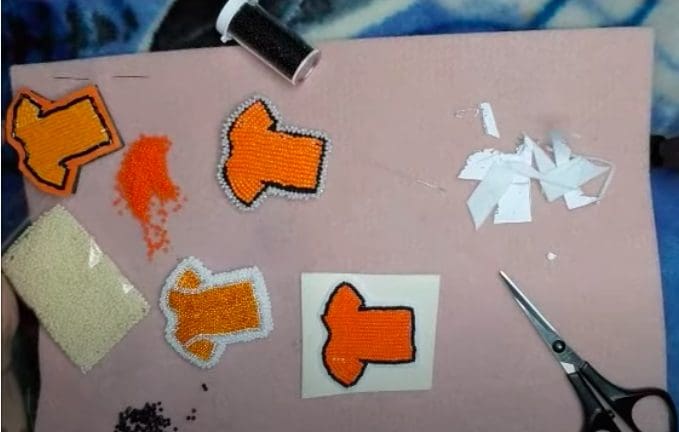
1. Gather your supplies.
- a shirt template (recommended)
- a glue stick
- felt or a similar stiffer fabric (Pellon© is a stabilizer fabric available at any craft or fabric store)
- a sewing needle
- thread in black or orange
- scissors
- a pin to glue onto the back
- fabric glue
- orange beads, size 10 or 11 if using seed beads
2.
Use the glue stick to attach the shirt template to the felt, or whatever material you are using as a stabilizer. Let it dry before you start sewing.
Note: If you already know how to sew and bead, you can trace or draw the shirt outline with either a ballpoint pen or a thin alcohol based marker and start beading free-hand.
3.
Thread your needle and tie a double knot at the end of your thread. This will keep the thread from being pulled out as you sew.
4.
Push your needle from the back of the piece and up through the paper. Pull the thread all the way through until you reach the knot.
5.
Thread on 4 orange beads and push them so they are resting on the line.
6.
Push your needle back down through to the stabilizer side. Try not to make it too tight, because you need to sew through the beads again.
7.
Push the needle back up through your beadwork, in-between the second and third beads. Pull the needle all the way through.
8.
Push your needle through the second and third beads, and pull the thread all the way through. Note the loop in the image below. This loop reinforces the beads.
9.
Repeat steps 4-8 until you reach the bottom of the line you are beading.
10.
Start your new row by pushing the needle up through the base of the orange shirt going in the direction of the bottom of the shirt. Follow steps 4-8 to complete this row.
11.
Repeat steps 4-9 until the entire outer edge of the shirt is beaded and tacked down.
12.
Continue to add beads until the template is covered as you like.
13.
Once the sleeves and the rest of the shirt are filled, cut off the excess felt or stabilizer. Do not cut too close to the threads, or the beads may fall off.
14.
Use a tiny amount of the fabric glue to secure the knot in place.
15.
Attach the pin. Some are designed to be sewn onto the felt, and you may need to do so before you begin beading. Some must be glued to a smaller piece of felt; and that piece glued to the back of your beaded creation. This step can be done last.
And, you’re done!
Wear your pin now and year-round, reflecting on its meaning and importance.
Note:
Beading for little ones
If younger children and those with smaller hands want to participate, consider incorporating simpler beading projects and using larger materials such as:
- Pony Beads
- Perler beads, laced or melted
- Pipe cleaners
- Yarn or ribbon for stringing, with tape added on one end to make point
Or using white glue, attach the beads straight to a piece of orange foam or felt


Add a comment to: Orange Shirt Day Pin DIY and Resources